Turkey Sous Vide
The traditional bird is often overcooked in some parts and undercooked in others. That isn’t surprising when you consider this: Most people put the entire bird in the oven. To make sure the turkey is cooked all the way through, some parts end up being dried out and overdone.
Why cook your holiday turkey with this traditional and outdated method? When was the last time you took a cow, shoved it into an oven, and hoped the ribs, steaks, and rump roast came out at the same time perfectly cooked? Never! We butcher the cow into different parts, and we cook all of the parts differently. Then there is the matter of getting the temperature we want in the very middle of the turkey. This often means the temperature on the outside would be overdone for our tastes. Now all we have to do is use the sous vide method and that problem goes away.
Step One:
Get a fresh, not frozen, turkey. Butcher the turkey or break it down into its parts: the breast, drumsticks, thighs. For those who don’t like to do this, here is a tip Your butcher will be happy to do this for you. Separate the thighs and drumsticks from the breast, and separate the wings. I like to have the breast cut into two equal parts, makes it even easier.. If you like the gizzard, neck, ribs, and wings, make some soup or stock out of them.
Step Two:
Salt the turkey. Salting the turkey skin starts the process of the Maillard reaction. The salting changes the nature of the proteins in the turkey, allowing them to retain moisture. With the turkey broken down, it will be a lot easier to properly salt. I use Kosher salt for this, and from about a foot above the turkey parts I rain down the salt. It should look like a light dusting of snow. Put the turkey into the refrigerator now, leave it uncovered. Having the turkey being broken down into parts makes it a lot easier to store in the refrigerator. You want to leave it in the refrigerator for at least 24 hours. The salt will preserve the turkey, as well as dry out the skin so that when you cook the skin it will be nice and crispy.
Step Three:
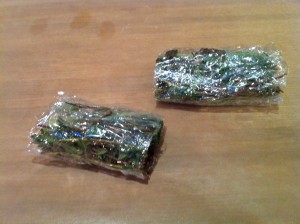
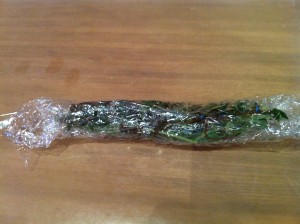
Cut them into one inch – leaving the ends open. This makes certain no piece of meat gets the intense flavor, but the spice is slowly infused during the Sous Vide process when it comes in contact with the butter or duck fat (I like duck fat)
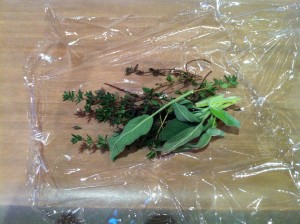
Before sealing the turkey, salt and pepper the parts on all sides. Roll fresh sage, thyme, and garlic in plastic wrap. Cut off 1-inch pieces of herb roll, and place one piece in each bag. Typically I use one bag for half a turkey breast, one bag for each thigh, etc. (However you break it down is fine.) Put some butter or duck fat in each bag, topped by the turkey, then the satchel of herbs. Seal the bags.
TIP: If you use duck fat, put it at the bottom of the bag, which means you put the butter or the duck fat into the bag first., so the grease won’t interfere with sealing the bag. IMPORTANT: Once you are done, put the bag(s) in the refrigerator or an ice bath if you are not ready to cook it immediately. This allows you to prepare the turkey ahead of time, so that you can drop them into the water oven according to your timing.
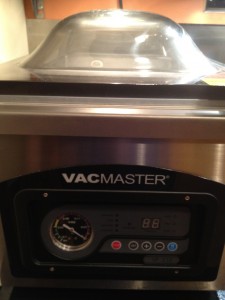
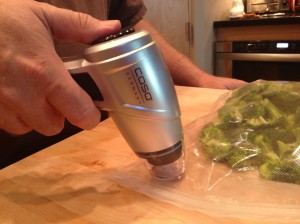
This is my favorite way to seal foods. Since we use Sous Vide at home a lot, this was a worthwhile investment
Step Four:
Step Five:
Do you want a nice roasted finish to the bird when it is done? Quick-fry the parts over medium to high heat. If you have a deep-fat fryer at home, you can dip the parts in oil heated to 375°F until the skin is just crisp. Otherwise, heat a pan over medium heat. Once heated add some grape seed oil to the pan. Gently place the meat, skin side down, into the pan. Let it sit there for at least 2 minutes. You will see that it is a nice crispy skin
Whole Turkey meat, per one cup serving: Calories 238, Fat 7 g, Protein 41 g, Carbohydrates 0 g, Fiber 0 g
TIP: For a turkey sandwich, slice some of the breast meat. This will be the moistest turkey that you have ever tasted. It won’t be dry, so you won’t need a lot of extra gravy or mayo or butter, or any other condiments you used to slather on. What about the dressing? Oh yes, the stuffing! You can put your favorite stuffing recipe into a bag and vacuum-seal it, and it will cook just fine in the water bath. Or you can bake it in a casserole dish, thus making your home smell like a delicious Thanksgiving meal. Cooking a turkey sous vide makes even the most hesitant cook’s home the place to go for Thanksgiving dinner.
BPA: The bags used are BPA free. Cooking in the bags is safe, and there is no chemicals or other issues with using these bags.
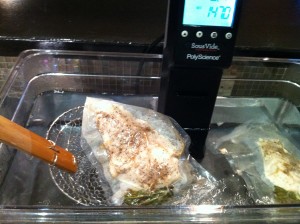
GERMS: While you are using low temperature cooking, some worry about bacteria. There is no pathologic bacteria that can survive above 122 degrees F. By cooking the turkey parts at this temperature you will kill 99.9999 % of all bacteria. This is safer than what was recommended by the Food Safety and Inspection Service (FSIS) who advise the United States Department of Agriculture about poultry. T
Here is our video:
 

